Gravity Forms Conversion Tracking With Google Tag Manager
How to track Gravity Form submissions and setup conversion tracking in 4 easy steps with Google Tag Manager.
Whether you are looking to better understand your website performance or optimise your Pay Per Click advertising, Conversion Tracking will be needed for measuring customer interactions and showing return on investment from your marketing.
Please Note:
- This guide will work for Universal Google Analytics. If you are using GA4 Google Analytics, in Step 3 you will need to select a GA4 event instead of a Universal Analytics event.
- This method of tracking will also only work if your Gravity Form uses the confirmation type “text”. It will not work if your form is set to redirect on form completion.
Step 1 – Create a form listener tag for Gravity Forms in Google Tag Manager
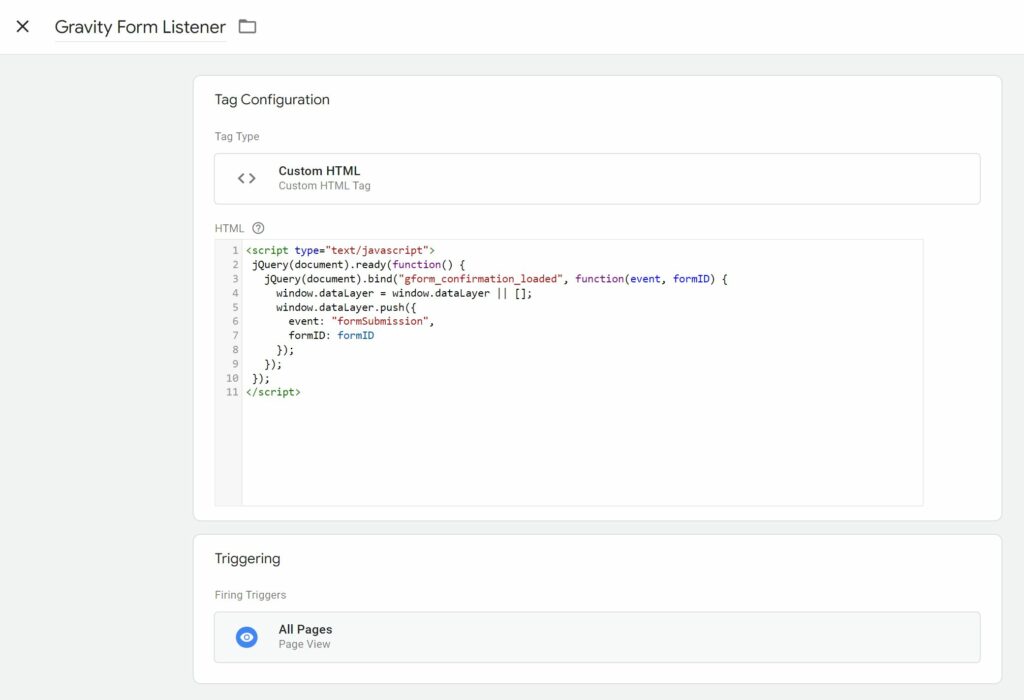
The form listener tag will create an event in Google Tag Manager that is fired when the gravity form confirmation message is displayed. The event will include the formID that we insert in Step 2.
Create a custom HTML tag with the following code in Google Tag Manager:
<script type="text/javascript">
jQuery(document).ready(function() {
jQuery(document).bind("gform_confirmation_loaded", function(event, formID) {
window.dataLayer = window.dataLayer || [];
window.dataLayer.push({
event: "formSubmission",
formID: formID
});
});
});
</script>
The trigger for this tag needs to be set to fire on All Pages (see screenshot 1.1):
Step 2 – Add script to form confirmation message in Gravity Forms
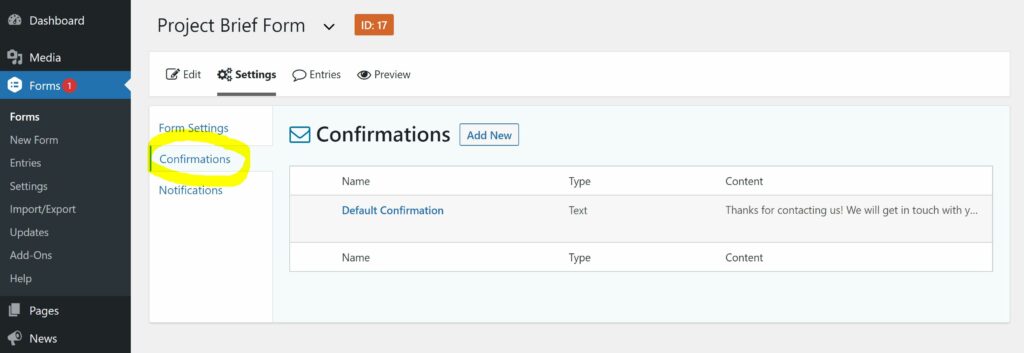
In WordPress navigate to Forms, select your form and then click to go to the Confirmation message (see screenshot 2.1)
Next, go into the confirmation message, switch to the “text” mode and turn on “disable auto formatting” (see screenshot 2.2). This will prevent the code snippet we are about to paste in from being changed by the editor.
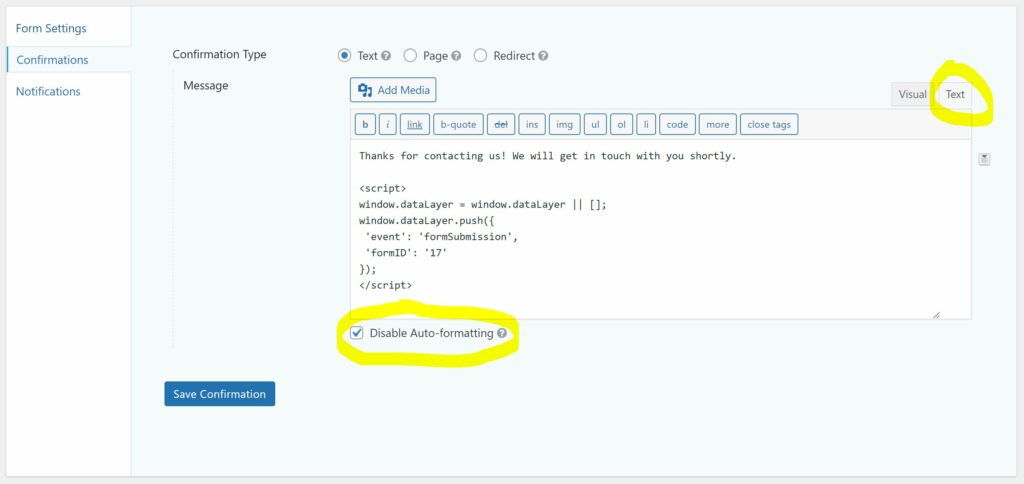
Add this code snippet into the message (see below). The Form ID can be changed to allow you to distinguish between your different forms in Tag Manager.
<script>
window.dataLayer = window.dataLayer || [];
window.dataLayer.push({
'event': 'formSubmission',
'formID': '17'
});
</script>
Step 3 – Create Tag in Google Tag Manager
The next step is to create a new tag in Google Tag Manager that will be triggered on the form completion from the script added in Step 2.
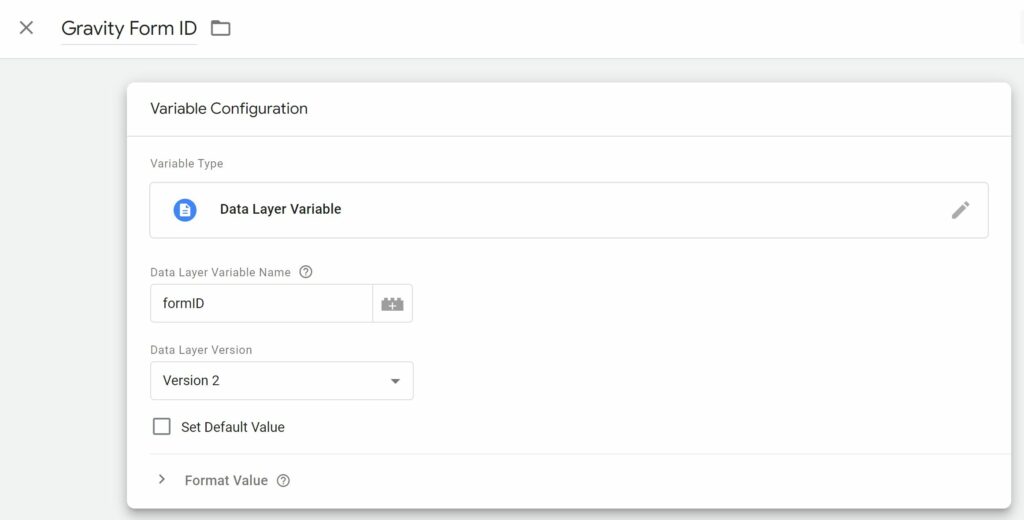
First, we need to create a new variable in Google Tag Manager that will be used for the Gravity Form ID parameter being pushed into the Data Layer.
Go to: Variables > New > Data Layer Variable
Configure the variable as shown below (see screenshot 3.1)
Click Save on this.
The next step is to setup our new Tag.
This Tag will send an event to Google Analytics on the form submission.
Go to: Tags > New > Google Analytics: Universal Analytics
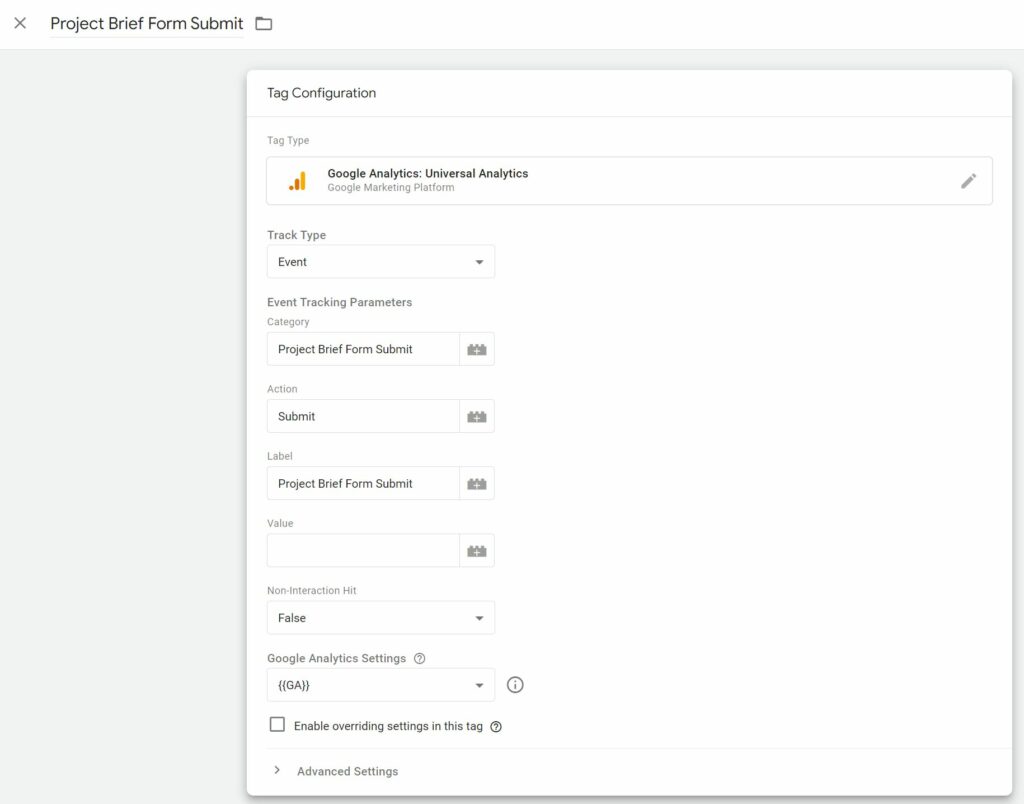
Configure your Tag as follows (see screenshot 3.2):
Ensure the Tag Track Type is set to “Event”. The Tag Name, Category and Label can be set to whatever you want. These are the event parameters that will show up in Google Analytics when the form submission is made.
The trigger for this Tag needs to be setup to fire on the form submission matching the formID we set in the script we added in Step 2.
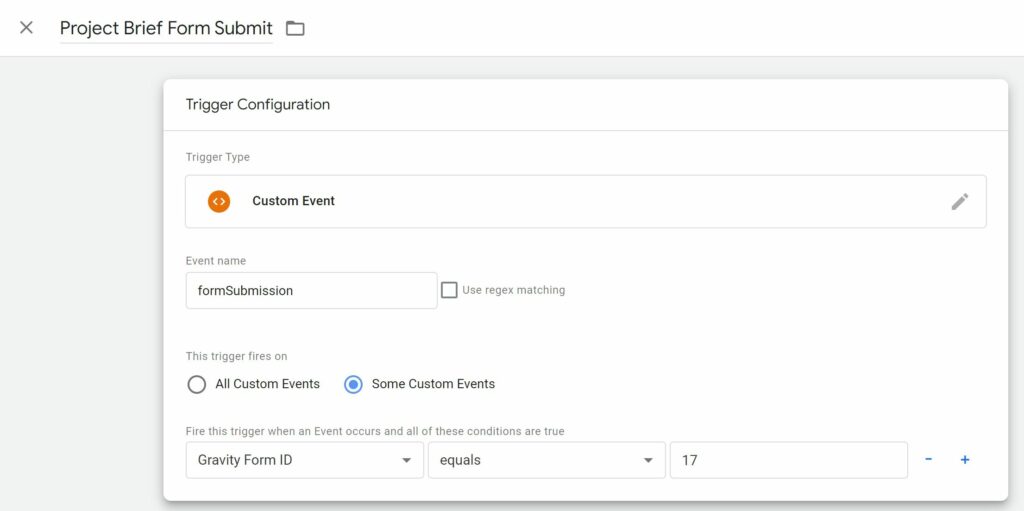
Under Triggers click New > Custom Event
Set the event name to formSubmission and select “some custom events”, then select the Data Layer Variable we created earlier. The Gravity Form ID needs to match the ID you set in the confirmation message script (in this example I used 17).
Your Trigger should look like this (see screenshot 3.3)
Step 4 – Create your Google Analytics goal
The final step is to create your Goal in Google Analytics to trigger on the new event we have created.
In Google Analytics, go to Admin > Goals > New Goal
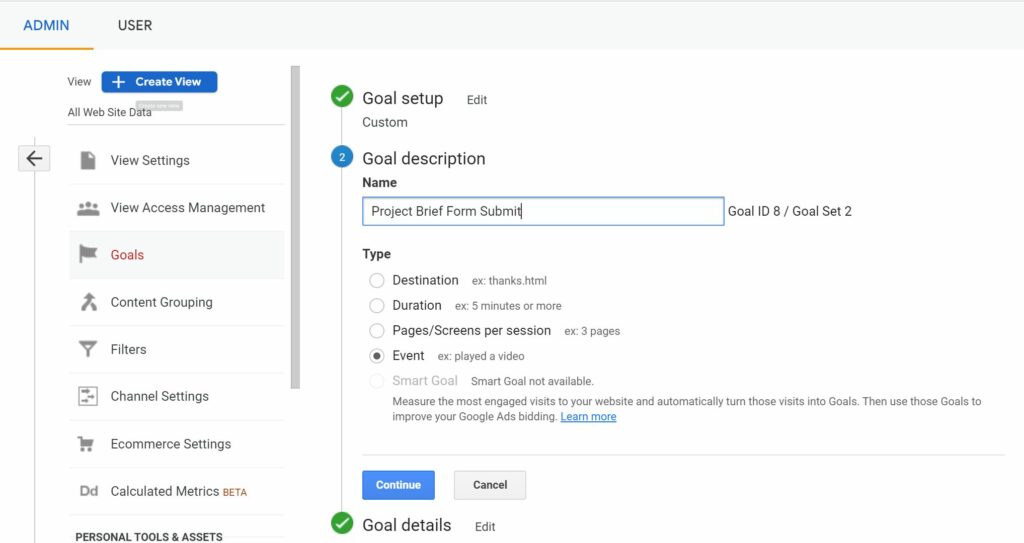
Select the goal type Custom and Event (see screenshot 4.1)
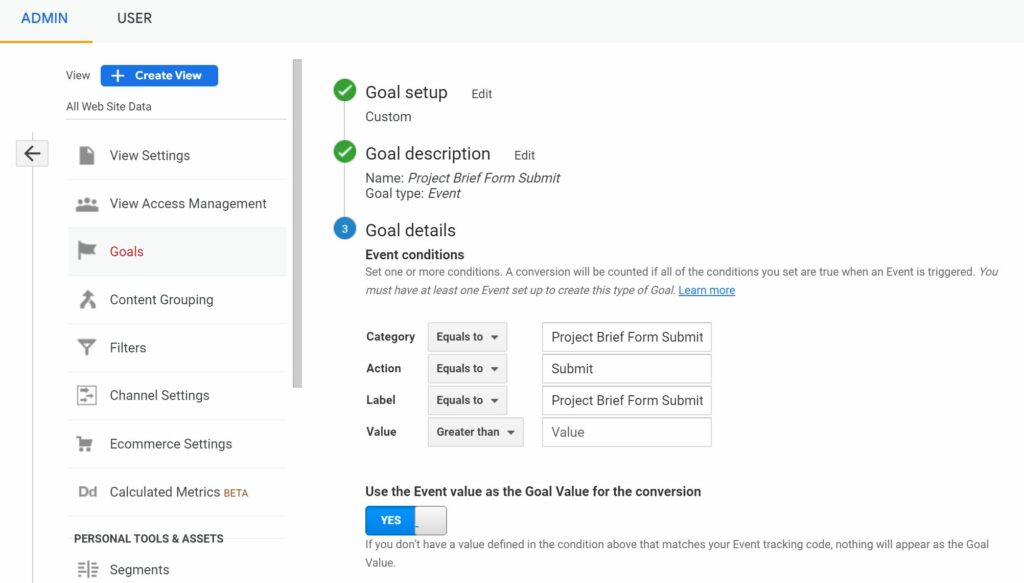
Configure your goal to match the event parameters you set in Google Tag Manager (see screenshot 4.2)
Click Save and your Goal is now created.
The final step would be to test your new goal by submitting a form in WordPress to see if the Event fires and conversion is created in Google Analytics.
Need help with your conversion tracking?
Our consultants have years of experience with Google Tag Manager and setting up Conversion Tracking. If you need help, get in touch.
Like it? Share it

